Showing posts with label art education. Show all posts

Thursday, July 7, 2016

Narratives: A Workshop Given by Terri Kern


Summer time is a perfect time for teachers to catch up on professional development.  Quite a few professional development opportunities have been offered by Greater Cincinnati area organizations.  I wish I could take them all but there is not enough time (or money) to do it all! I had to choose wisely and I think my choice was a good one! Last week I had the opportunity to take a week long, intensive class from the wonderful ceramic artist, Terri Kern.  I have pictured one of her pieces above but you can also see more of her work here.  The workshop was offered at Queen City Clay, a public clay studio here in Cincinnati.  Just stepping into this place will inspire you to make something!  It is a dream come true for artists, and I got to spend five days there being taught by a professional artist and surrounded by other students who are artists and teachers. We learned so much from Terri and each other all week long!


Terri Kern's artwork is rich with symbolism, telling stories about herself and those she loves.  Each piece has hours invested in beautiful craftsmanship. The unique imagery of animals and objects is a fantasy for your eyes to get lost in.  


The morning of the first day Terri shared with us about her background and how she got to where she is today.  Her life experiences inspire her art.  When she was a young girl she went to day camp at the natural history museum. She remembers being one of the first people allowed in the museum in the mornings and seeing the exhibits of natural objects with lights on them.  This influenced her greatly and today her art work reflects that precious experience.  Terri's work is very personal and I feel that is one reason her artwork is successful.


Each day of the workshop Terri would give us a demonstration in the morning and in the afternoon, allowing us to have the remainder of the time to work on the project assignments that she had given us.  She was so good at continually checking with each student in the workshop to see how we were doing and to give us our own personal demonstrations if we needed help!

Terri uses mostly underglazes for her designs.  The first project involved a sgraffito technique on a glazed background of blended yellows, oranges and reds. Sgraffito is a technique of carving into the glazed surface of a ceramic piece.  We first transferred our design onto the background color with pencil and then began painting the design in black.  As the black glaze dried we scratched into it with various tools. Above is my tile before it was fired and also before it got the coat of clear gloss glaze.  


The second day we did a design on a new tile that involved a sgraffito technique that was faster, scratching into a semi-wet, glazed surface. This was on a black, glazed background.  I liked doing this technique a lot!  She also taught us about blending the colors before scratching into the glaze.  Above is my little interpretation of a dessert I make with strawberries, blueberries and kiwi.  

The third project was a tile that combined all of the techniques she had taught us up to that point.  This is my design, in progress, pictured above.
 I have always known that craftsmanship is important, but this workshop really emphasized that for me.  Terri reinforced how important it is to keep trying and practicing to get better and find the best way to do something.  When she is working on her pieces she makes sure that each little part is done with her best effort and if she gets tired she takes a break, so that when she comes back to it she can continue to do the best work she can.  When someone owns that piece they will see the close attention and thoughtfulness that she put into every part.  

Now when I am working on my own artwork I am thinking about being careful and giving it that high amount of attention. 


The fourth day was packed with more demonstrations and projects to make.  Terri showed us how she makes her miniature books using a slab of clay cut into small pieces.  She demonstrated how she creates the pages and details on each book.  


Terri makes whimsical salt and pepper shakers. These salt and pepper shakers by students in the class were each made with one triangular slab.  All three points of the triangle were pulled together and then the sides were pinched together and details added.  


Terri's necklace pendants inspired these made by students in the class.  


This cocktail cup (above) by Terri was first painted with black glaze, and then while it was still wet, the sgraffito technique was used to create the design, complete with a cocktail recipe.  The glaze is applied to the cup while it is still greenware.

Above is my cocktail cup with a mango! 

The fifth day Terri demonstrated her relief carving. An example of her carving can be seen on the nest pictured earlier in this post. We spent the day finishing up all of the projects of the week.  

In addition to the variety of techniques that I learned in this class, that I can apply to my own art work and my teaching, I took away something else.  Terri opened a fresh channel of creativity in making my own art work. She also gave me confidence in putting my work out in the gallery world, which is something that I have been recently working on.
As an art educator it is important to pursue my own creative adventures.  This allows me to direct my students more successfully when they are struggling, because I know first hand what it is like to be in that situation.  It sets an example for my students, showing them that making art is an important profession that is a part of our community. Making my own art work makes me a better art teacher.
The Night Before the Storm
Abby Miller
2016


Sunday, November 9, 2014

Its OAEA Conference Time!

Last week I was able to attend my art education association's state conference, held in Columbus, Ohio.  I am pretty lucky to belong to OAEA.  I have been able to attend this conference almost every year that I have been teaching, with the exception of two years. That means I've been going to this artapalooza for 15 years!  There were so many workshops to attend, guest speakers, ideas, colleagues to connect with and art to see!  I soaked it up like a thirsty sponge!  Below are photos of just some of the workshops I went to and experiences I had.  
This workshop was all about Miniatures. Above you see a toad stool house made of Cloud Clay with a cardboard tube armature .  This workshop was by Virginia Pacer, Laura Lohman and Lisa Bookenberger.  These women are so creative and energetic!  

Here is my region's (South West) exhibit, showing our kelly green.  The display was nothing but the best, like always!

 These tiles are from an off-site workshop where we went to Buckeye Ceramic Supply and the Mayco glaze factory.  Attendees painted three tiles, each with a different technique/lesson.  We also took a tour of the factory!


 My friend Gail, who I attended grad school with at the Art Academy of Cincinnati, and me posing in the photo booth.


This was a center piece at dinner one of the evenings.  It was made by some students studying the art work of glass artist, Dale Chihuly and taught by Sandra Bacon.  Sandra lead a workshop on this lesson.  
Above is a photo of an activity from Sandra's workshop, dropping food coloring into water.  Students took photos when they did this to recreate the fluidity of glass.  So awesome!


The view from my room.

Chinese Calligraphy


 This workshop was lead by Jinghong Cai.  She showed how to write Chinese symbols with brushes and ink.  This was particularly interesting to me because I teach a lesson about the Chinese New Year to my 5th graders and I will definitely be able to use what I learned in my class!
Faux Enameling taught by Dawn Blattel.  This is a technique I think Dawn pretty much made up on her own.  These are so stunning when you see them in real life.  The colors pop and they have depth to them because the lines are actual walls made with aluminum foil. The color is tissue paper dipped in watered down glue and then pressed into each area.  Dawn does this with her 7th graders and I think I could adapt for my 6th graders and the time barriers.  


The workshop that sticks out in my mind the most I did not take any pictures of.  It was called "Giving Birth to Student Cultivated Learning Environments."  One of the things I can improve on in my teaching is getting to know the students more personally.  It can be challenging as a teacher of 890 students only seeing them once a week for 40 minutes to get to know them personally.  They shuffle in and then shuffle out and then the next group comes and this happens 6 to7 times a day.  
Daniel Humphrey and Dillon Sedar sparked some ideas in my thinking about how I can build more of a relationship with my students but I will really need to focus on this to accomplish it.  
By the way, I wrote in my notes that Daniel Humphrey looks like a young John Cusack.  He really does!  You cannot ignore it, and I really wish I had taken a picture so that I could show you the resemblance! (I guess that would have been kind of awkward, though.)  I would put a split screen right here.  


Their key points in what they said in the presentations are as follows:
  • Its all about the Relationships (make a personal connection with them)
  • Connect with your students on a personal level (say hi every day)
  • Create a space/learning environment where students feel safe to explore their full imagination (name stuff in your room: paper towel dispenser, scrap box) 
  • Allow and Encourage students to take ownership in their schooling. (have students make their own learning objectives, ask students what they want to learn)
  • Students do not need to be shown culture in the art room.  They are the culture. Use their culture. (start where the students want to start and bring it to an art history lesson or principles and elements lesson)
  • Create Meaning (students make the class still-life together with the teacher)
  • There are many different ways to solve one artistic problem.  Allow students to explore their interpretations of the contexts you present.  
  • Everybody's right. Everybody's wrong. (we can learn from each other)
  • Brag about your students and their accomplishments (art show, newspaper)
Honestly, to try some of these things is going to be stepping out of my own comfort zone.  But isn't that what we have to do to improve our teaching?  We all teach with different styles and these points can be applied at different levels of intensity according to what our classroom needs.  

Thanks to all the people who made this OAEA conference such a valuable learning experience. 


Saturday, September 13, 2014

Charley Harper Animal Designs

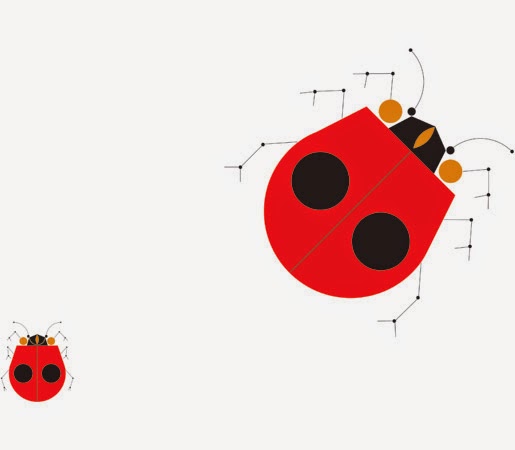
Each time I teach a lesson it gets a little better.  It is always an opportunity for me to fine tune how I deliver the lesson which, in turn results in a richer learning experience for the students. When I teach this Charley Harper lesson I really want the students to understand how Harper used shapes.  He took simple, geometric shapes, disassembled them and reassembled them to create new shapes that represented many different animals and insects.  It is my hope that the students will learn how to do this as a result of doing this project.  The thing that blows my mind about his work is that his designs have a realistic look to them even though they are created with the simple shapes he started with.  Here is a link to the post about the project last year.
"When I look at a wildlife or nature subject, I don’t see the feathers in the wings, I just count the wings. I see exciting shapes, color combinations, patterns, textures, fascinating behavior and endless possibilities for making interesting pictures. I regard the picture as an ecosystem in which all the elements are interrelated, interdependent, perfectly balanced, without trimming or unutilized parts; and herein lies the lure of painting; in a world of chaos, the picture is one small rectangle in which the artist can create an ordered universe." -Charley Harper


We start by looking at a number of paintings and prints by Charley Harper, who was a Cincinnatian.  


Next, the students decide on an animal they would like to create, Harper style.  They gather some colors of construction paper and trace and cut out shapes.  One requirement is that they must use a circle or part of a circle.  Charley Harper used many circles in his art work!
Previously during this project I didn't see as much experimentation with the placement of shapes and use of shapes as I had wanted to.  The results were not as "Harper-esque" as I would have liked them to be. This time around I encouraged the students to experiment with the arrangement of the shapes and look at photos of the animal they were making, and simplify the animal into geometric shapes.  The students use stencils to trace, and I added a larger circle stencil to our collection.  I demonstrated how to get a half circle by tracing a circle, cutting it out and folding it in half and then cutting on the crease.  Fold a half circle in half and cut that in half.  For eyes or tiny circles the students used a hole punch.


On the first day the students work on the animal designs I do not have glue on the tables, just because I want them to take some time to try a variety of arrangements of their shapes before they start gluing.  The next time the students come to art I have glue on the tables and when they are satisfied with what they have they can start gluing.


After the animal is glued down to a background the students draw details in marker.
Below are some in-progress designs by this year's 5th graders.  When they are complete I will show the finished product.  The students will identify the ecosystem of the animal and draw a background that suggests that ecosystem.  (Science integration!!!)


Do you teach any lessons on Charley Harper? What would you do to improve this project?   I would love to read your comments so be sure to post in the comment section below!


Next post I will share with you our visiting artist who played with fire and captivated every one of my 6th graders!