Sunday, September 18, 2016

Glass Across the Curriculum

Social Studies/History
Science
Music

..all connected by glass art!

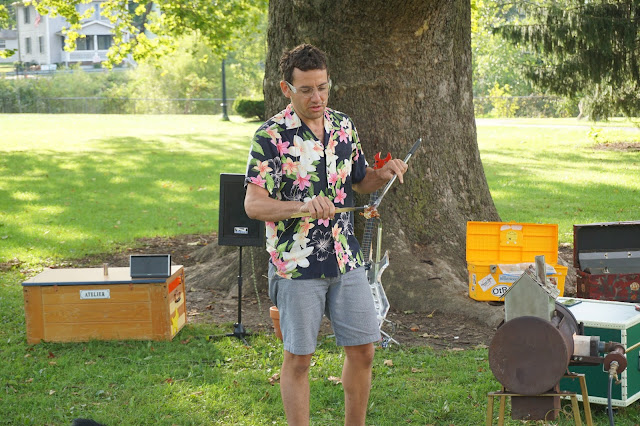
This is an experience Berry 6th graders have had this week in art class.  Darren Goodman is our visiting artist and he calls his presentation Glass Experience.  This is our third year welcoming Darren to our school to have him share his life lessons, art and songs.  Two years ago my students collaborated on a project with Darren that was installed at Cincinnati Children's Hospital.

 This unique encounter with an artist includes a hand-made, one of a kind portable glass furnace. His captivating presentation points out many meaningful messages each connecting to one another with fluidity and grace.


One of the first things he says to my students is to ask the question, "Does anyone know where glass came from?"  When the students answer without hesitation that glass comes from sand, he asks "Where does sand come from?"  The students confidently answer "...from broken up rocks!" They know because they are studying rocks in science!


A connection with social studies is made as Darren explains that the ancient Egyptians made the first vessels using glass cane.  He then goes on to demonstrate the connection of glass with the future, an extension of the very first glass technology.

Darren illustrates the very recent invention of fiber optics as he pulls a very thin cable of glass from the molten glass on the end of his blow pipe.


Race cars!  Ferraris to be exact!  That is the topic of a story Darren tells about how he was asked to create the trophies for the Ferrari Challenge.  Making these red, glass trophies was very challenging because working with red glass is difficult.  One day an in progress trophy got too hot and fell to the floor.


He was angry at first but then realized that a gift was given to him.  He decided to call this new shape a Tear of Joy.  He continued to make more and more of these Tears of Joy and ended up showing them in galleries and museums.  The lesson that is learned is the tears are very thin but also very strong because of their shape. Each tear is unique and displayed in a group where their message is the strongest, just like people in communities working together as one. 

All of this is done while Darren plays a recording of some songs that he wrote himself!  If that is not enough music for you, he then answers questions at the end of the presentation in song. He ends everything on a good note by playing his guitar (that looks like glass but is really made of plastic) with a glass cane that he made during the presentation.  Genius!


Music Made With Glass
You can view a video of Darren playing music with glass by clicking the link above.

My students leave this presentation wanting more and that is the best way to end a class period in any subject!  I plan on having the students use glass in a project later on this year.  I will post about it when we get to that lesson!


.

Sunday, August 14, 2016

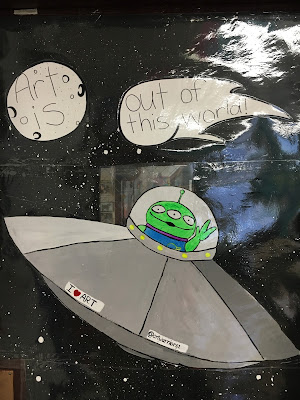
Art Is Out Of This World!

It's that time of year again. All over the nation art teachers are getting their art rooms back to being AWESOME!  

This summer I was so much inspired by the website The Art of Education!  I attended their Art Ed Now National Online Conference and I also started listening to their Podcast, Art Ed Radio.  This summer was just one big fireball PD summer for me and my art room and lessons are going to show it!

I recently read an article on The Art of Education called How to Grab Your Students' Attention by Branding Your Classroom. The article suggests to choose a theme and use images from the theme throughout the room in decor, props and classroom management plan. I was looking for a way to catch the attention of my students and when I read this article I could not pass up the opportunity to change the face of my classroom.

I chose the theme "Art Is Out Of This World!"  Anything "outer space" fits this theme!  I collected a bunch of toys and decor of my own two sons that fell in the outer space category, and created an arrangement in the display case outside my art room door.   I created posters and space decor to put up around the room. The poster pictured above is on my door.  Below you can see it in its entirety.

I knew I wanted to use an alien image and I started to create an original one.  However, I decided on the Toy Story alien because my original designs were unfamiliar and weird.  I don't want to creep out my students, I want to make them smile! 
Everybody knows and loves this guy!

This is my behavior management system.  I changed the look of it but the way it works is the same tried and true method I've been using for a few years now.  The class begins with three points.  Misbehavior or a loud noise level will cause the class to loose points.  At the end of class if they still have three points the class moves their clip forward a space on the "game board".  When the class gets to the rocket they earn a reward day.  Reward days are free days with art stations!

 Rocket table signs!

 Each table has a comet the color of the table sign.  Every week a different color comet will be displayed to show what table is the "helper group."


I had fun making all of the space art to hang up!  I hope my students enjoy it as much as I do!

Until next time...


Thursday, July 7, 2016

Narratives: A Workshop Given by Terri Kern


Summer time is a perfect time for teachers to catch up on professional development.  Quite a few professional development opportunities have been offered by Greater Cincinnati area organizations.  I wish I could take them all but there is not enough time (or money) to do it all! I had to choose wisely and I think my choice was a good one! Last week I had the opportunity to take a week long, intensive class from the wonderful ceramic artist, Terri Kern.  I have pictured one of her pieces above but you can also see more of her work here.  The workshop was offered at Queen City Clay, a public clay studio here in Cincinnati.  Just stepping into this place will inspire you to make something!  It is a dream come true for artists, and I got to spend five days there being taught by a professional artist and surrounded by other students who are artists and teachers. We learned so much from Terri and each other all week long!


Terri Kern's artwork is rich with symbolism, telling stories about herself and those she loves.  Each piece has hours invested in beautiful craftsmanship. The unique imagery of animals and objects is a fantasy for your eyes to get lost in.  


The morning of the first day Terri shared with us about her background and how she got to where she is today.  Her life experiences inspire her art.  When she was a young girl she went to day camp at the natural history museum. She remembers being one of the first people allowed in the museum in the mornings and seeing the exhibits of natural objects with lights on them.  This influenced her greatly and today her art work reflects that precious experience.  Terri's work is very personal and I feel that is one reason her artwork is successful.


Each day of the workshop Terri would give us a demonstration in the morning and in the afternoon, allowing us to have the remainder of the time to work on the project assignments that she had given us.  She was so good at continually checking with each student in the workshop to see how we were doing and to give us our own personal demonstrations if we needed help!

Terri uses mostly underglazes for her designs.  The first project involved a sgraffito technique on a glazed background of blended yellows, oranges and reds. Sgraffito is a technique of carving into the glazed surface of a ceramic piece.  We first transferred our design onto the background color with pencil and then began painting the design in black.  As the black glaze dried we scratched into it with various tools. Above is my tile before it was fired and also before it got the coat of clear gloss glaze.  


The second day we did a design on a new tile that involved a sgraffito technique that was faster, scratching into a semi-wet, glazed surface. This was on a black, glazed background.  I liked doing this technique a lot!  She also taught us about blending the colors before scratching into the glaze.  Above is my little interpretation of a dessert I make with strawberries, blueberries and kiwi.  

The third project was a tile that combined all of the techniques she had taught us up to that point.  This is my design, in progress, pictured above.
 I have always known that craftsmanship is important, but this workshop really emphasized that for me.  Terri reinforced how important it is to keep trying and practicing to get better and find the best way to do something.  When she is working on her pieces she makes sure that each little part is done with her best effort and if she gets tired she takes a break, so that when she comes back to it she can continue to do the best work she can.  When someone owns that piece they will see the close attention and thoughtfulness that she put into every part.  

Now when I am working on my own artwork I am thinking about being careful and giving it that high amount of attention. 


The fourth day was packed with more demonstrations and projects to make.  Terri showed us how she makes her miniature books using a slab of clay cut into small pieces.  She demonstrated how she creates the pages and details on each book.  


Terri makes whimsical salt and pepper shakers. These salt and pepper shakers by students in the class were each made with one triangular slab.  All three points of the triangle were pulled together and then the sides were pinched together and details added.  


Terri's necklace pendants inspired these made by students in the class.  


This cocktail cup (above) by Terri was first painted with black glaze, and then while it was still wet, the sgraffito technique was used to create the design, complete with a cocktail recipe.  The glaze is applied to the cup while it is still greenware.

Above is my cocktail cup with a mango! 

The fifth day Terri demonstrated her relief carving. An example of her carving can be seen on the nest pictured earlier in this post. We spent the day finishing up all of the projects of the week.  

In addition to the variety of techniques that I learned in this class, that I can apply to my own art work and my teaching, I took away something else.  Terri opened a fresh channel of creativity in making my own art work. She also gave me confidence in putting my work out in the gallery world, which is something that I have been recently working on.
As an art educator it is important to pursue my own creative adventures.  This allows me to direct my students more successfully when they are struggling, because I know first hand what it is like to be in that situation.  It sets an example for my students, showing them that making art is an important profession that is a part of our community. Making my own art work makes me a better art teacher.
The Night Before the Storm
Abby Miller
2016




Thursday, February 18, 2016

Managing the Art Room


Motivation Needed


Its not easy to transition from one class to the next, switch from this project to that, motivate 28 students to return the art room to a presentable, organized state in five minutes or less AND make it fun and something the kids want to do.  

I want to share with you a couple of systems that I use in my art room.  One that I have been using for  the last 18 years and one that I just began this year.  Not this school year. This 2016 year, and I'm wondering why I didn't start it sooner because it works so well and the kids love it.  

Golden Broom (the old trick)

  At the end of each class period, after the students have lined up, I judge how well the class cleaned up, and if they did a good job I award them with a ticket or more to drop in a jar (I have one for each grade). They write their homeroom teacher's name on the ticket.  On Friday at the end of the day a ticket is drawn out of each jar and the winners are announced during announcements.  The winning classes keep a Golden Broom trophy (a small broom I spray painted gold) in their homeroom for the following week until the next winner is announced.  

Clean-Up Jobs (the new trick)


I would like to thank blogger, Cassie Stephens for giving me the inspiration for this idea.  The management method she demonstrates in her blog post gave me the idea for my system.

When students are finished with their project for the day, they go over to this poster and select a clip from the poster that has a job written on it.  
I made a clip for each job needed to clean up after any project we do. Different clips are put on the poster each day or class period depending on the project we are doing.  This gives the students more ownership for organizing and cleaning up the art room.  When students finish for the day they flock to the poster to choose a job and they love being in charge of what they choose to do.  My favorite is the "shelf keeper."  This works very well for 3-D projects.  The shelf keeper directs students where to put their projects and checks if the name and class code is written on it and anything else that needs to be checked.  For example if there is glaze on the bottom of a clay piece they either wipe it off or send it back and have the owner of the piece fix the problem.  It frees me to be able to continue to circulate around the room and assist students.  The clips are attached the students' clothing so I know who is doing what.  The students return the clips before they leave. This system is great for keeping those mobile kids busy!


Happy Chinese New Year

Peace and Good Luck!

Each year my 5th graders make a Chinese New Year hanging medallion.  
Here are the "I Can" statements that I post in the room for this project:

I can:
  • Explore the art of Chinese calligraphy.
  • Demonstrate carving in clay.
  • Demonstrate good craftsmanship in constructing, carving and glazing.
We begin by talking about some Chinese New Year traditions and the differences and similarities of our New Year celebrations and those in China.  The students practice writing Chinese symbols on red paper.  I provide handouts of symbols of the animals in the Chinese Zodiac and some other chinese words for prosperity in the new year.  
Constructing a clay disk:
The students each receive a piece of clay that they shape into a ball.  The ball is then flattened by pushing it down with the palm of the hand onto the student's work mat (burlap).  The student smooths out the rough spots and when they are happy with their disk they copy a Chinese symbol onto the clay by lightly scratching it into the surface.  Then the symbol is carved using a clay wire tool over the lines that were scratched, making them deeper.  The students then create a design around the symbol with clay tools and other objects that can be used to push into the clay to create texture.  A hole is made at the top and the bottom and the student writes his or her name on the back and their class code.  
The students use red glaze because red is the color of the Chinese New Year and it is a symbol of good luck.  After the clay pieces are finished I show the students how to make a tassel with yarn and they tie it on the bottom.  

Make a tassel:
1.  Wrap yarn around a piece of 6" cardboard 15-20 times.  
2.  Tie a piece of yarn around all the strands on one side of the cardboard.  
3.  Turn the cardboard over and cut through all of the pieces of yarn.  
4.  You will have something that looks kind of like a mustache.  Make the mustache into a ghost by gathering all of the strands together.  Tie a string around the top part so it looks like the "ghost" has a head.  
5.  You are finished making your tassel!


Embellished Clay Pinch Pots

Function and Beauty

These whimsical little pinch pots were made by 6th graders.  The students were required to create texture on the outside and inside of the pot.  After the pinch pots were glazed and fired the students embellished them with beads and wire.  Two choices they had were weaving wire in and out all the way around the pot, or creating a handle with the beads and wire. See another project using clay pinch pots here.